How to Find and Fix a Leaky Roof in Frankston & the Mornington Peninsula

There is nothing quite like that sinking feeling you get when water starts dripping through your ceiling. You are sitting in your lounge room in Mount Eliza or Frankston South, listening to the rain hammer down outside, and suddenly — drip, drip, drip.
You find yourself staring at a growing brown stain spreading across your plasterboard, or worse, scrambling for a bucket to catch a steady stream of water. In that moment, your mind starts racing. How bad is the damage? Where is the water coming from? Is the ceiling going to collapse?
Roof leaks rarely wait for a convenient time. They don't happen on sunny, dry Tuesdays when you have a free afternoon. They show up during the heavy winter storms that batter the bay, at 2:00 AM when the wind is howling off the water, or right after you've spent your savings on a holiday.
At Frankston Peninsula Roofing, we help homeowners across Melbourne's Bayside and the Peninsula deal with leaks every single week. From the salt-sprayed roofs of Seaford to the leafy streets of Narre Warren, we have seen it all — cracked tiles, rusted valleys, damaged flashing, blocked gutters, comprehensive roof restorations, and full roof replacements.
The good news? You don't need to be a qualified roofer to figure out the basics of what is going wrong or to take immediate steps to protect your home. While professional intervention is usually required to fix the root cause permanently, knowledge is your best defence against water damage.
In this definitive guide, we cover everything from safety protocols and leak detection through to emergency fixes, DIY vs. professional repairs, restoration versus repair decisions, and long-term maintenance — all tailored to the unique challenges of roofing on the Mornington Peninsula.
Step 1: Stay Safe Before You Start (The Golden Rules)
Before we even discuss looking for cracks or rust, we need to have a serious conversation about safety. Roofing is statistically one of the most dangerous trades in Australia. For a homeowner without experience, the risks are compounded.
⚠️ Safety Warning: Do not climb onto your roof if it is wet, steep, or unstable. Falls from roofs are a leading cause of serious injury in Victoria. When panic sets in because water is dripping onto your expensive carpet, common sense often goes out the window — but no ceiling stain is worth a broken leg.
The Safety Checklist
If you are determined to inspect the roof yourself, strictly follow these protocols:
- Wait for the Weather: Never inspect a roof during a storm, rain, or high winds. Wet moss on concrete tiles is as slippery as ice. Wet Colorbond is even worse. Wait for a clear, dry day.
- Footwear Matters: Do not wear thongs or smooth-soled sneakers. You need rubber-soled, non-slip work boots with good ankle support.
- Ladder Safety: Ensure your ladder is rated for your weight. Place it on solid, level ground. Extend the ladder at least 1 metre past the gutter line. Tie the top off to the gutter structure so it cannot slide sideways, and have a spotter at the bottom to hold it steady.
- Avoid the Edge: Stay away from the roof edge. If you have a harness, use it. If you don't, stay low and keep your centre of gravity close to the roof surface.
- Identify Power Lines: Look up before you carry a ladder. Overhead power lines are common in older suburbs like Frankston and Seaford. Touching a line with an aluminium ladder is fatal.
💡 Pro Tip: The "Risk Factor" Rule: If you look at your roof and feel even a flutter of nervousness about the height or the pitch, do not do it. Call a professional who has the harness, the training, and the insurance to go up there safely.
Step 2: How to Find the Source of a Roof Leak (The Detective Work)
Finding the leak is often harder than fixing it. Water is tricky — it travels. Just because water is dripping from the light fixture in your kitchen does not mean the hole in the roof is directly above the kitchen island.
Water obeys gravity, but it also follows the path of least resistance. It can enter through a cracked tile near the peak of the roof, run down a rafter beam for three metres, hit a purlin, travel sideways for another metre, and finally drip onto the insulation and soak through the ceiling plaster.
1. Analyse the Ceiling Stain
You can often identify the general area of a leak without ever stepping foot on a ladder. Start your investigation inside the house:
- Brown/Yellow Rings: This usually indicates a slow, intermittent leak that happens during rain. The dark ring is the dried mineral deposit from the water.
- Dark Mould Spots: This suggests a long-term moisture issue, possibly from poor ventilation or a very slow leak that keeps the area damp but doesn't drip.
- Sagging Paint/Plaster: This is an emergency. Water has pooled behind the paint or absorbed into the plasterboard. Carefully puncture this with a screwdriver to release the water and prevent the ceiling from collapsing under the weight.
2. Enter the Roof Cavity
Grab a bright torch and a dust mask. Climb into your roof cavity through the manhole:
- Look for Light: During the day, turn off your torch for a moment. Do you see pinpricks of daylight coming through the tiles or metal sheets? If light can get in, water can get in.
- Trace the Trail: Look for wet insulation, dark streaks on the timber trusses, or water stains on the foil sarking (the silver membrane under the tiles).
- Follow it Up: Follow any water trails upward to their highest point. That is likely where the breach is.
3. The Hose Test (Requires Two People)
If it is a dry day and you cannot find the source, you can simulate rain:
- Person A: Goes on the roof with a garden hose.
- Person B: Stays inside the roof cavity with a torch.
- The Method: Person A starts low on the roof, spraying a specific section gently for 5-10 minutes. If no leak appears, move up a metre. Work your way up the roof slowly.
- Important: Do NOT spray water up the roof (against the overlap of the tiles). Rain falls down, so spray down. If you spray up, you will force water into places it wouldn't naturally go, creating a false positive.
Step 3: The Usual Suspects — Why Roofs Leak in Melbourne
At Frankston Peninsula Roofing, we find that 90% of leaks can be traced back to a handful of common issues. Understanding your roof type helps you know where to look.
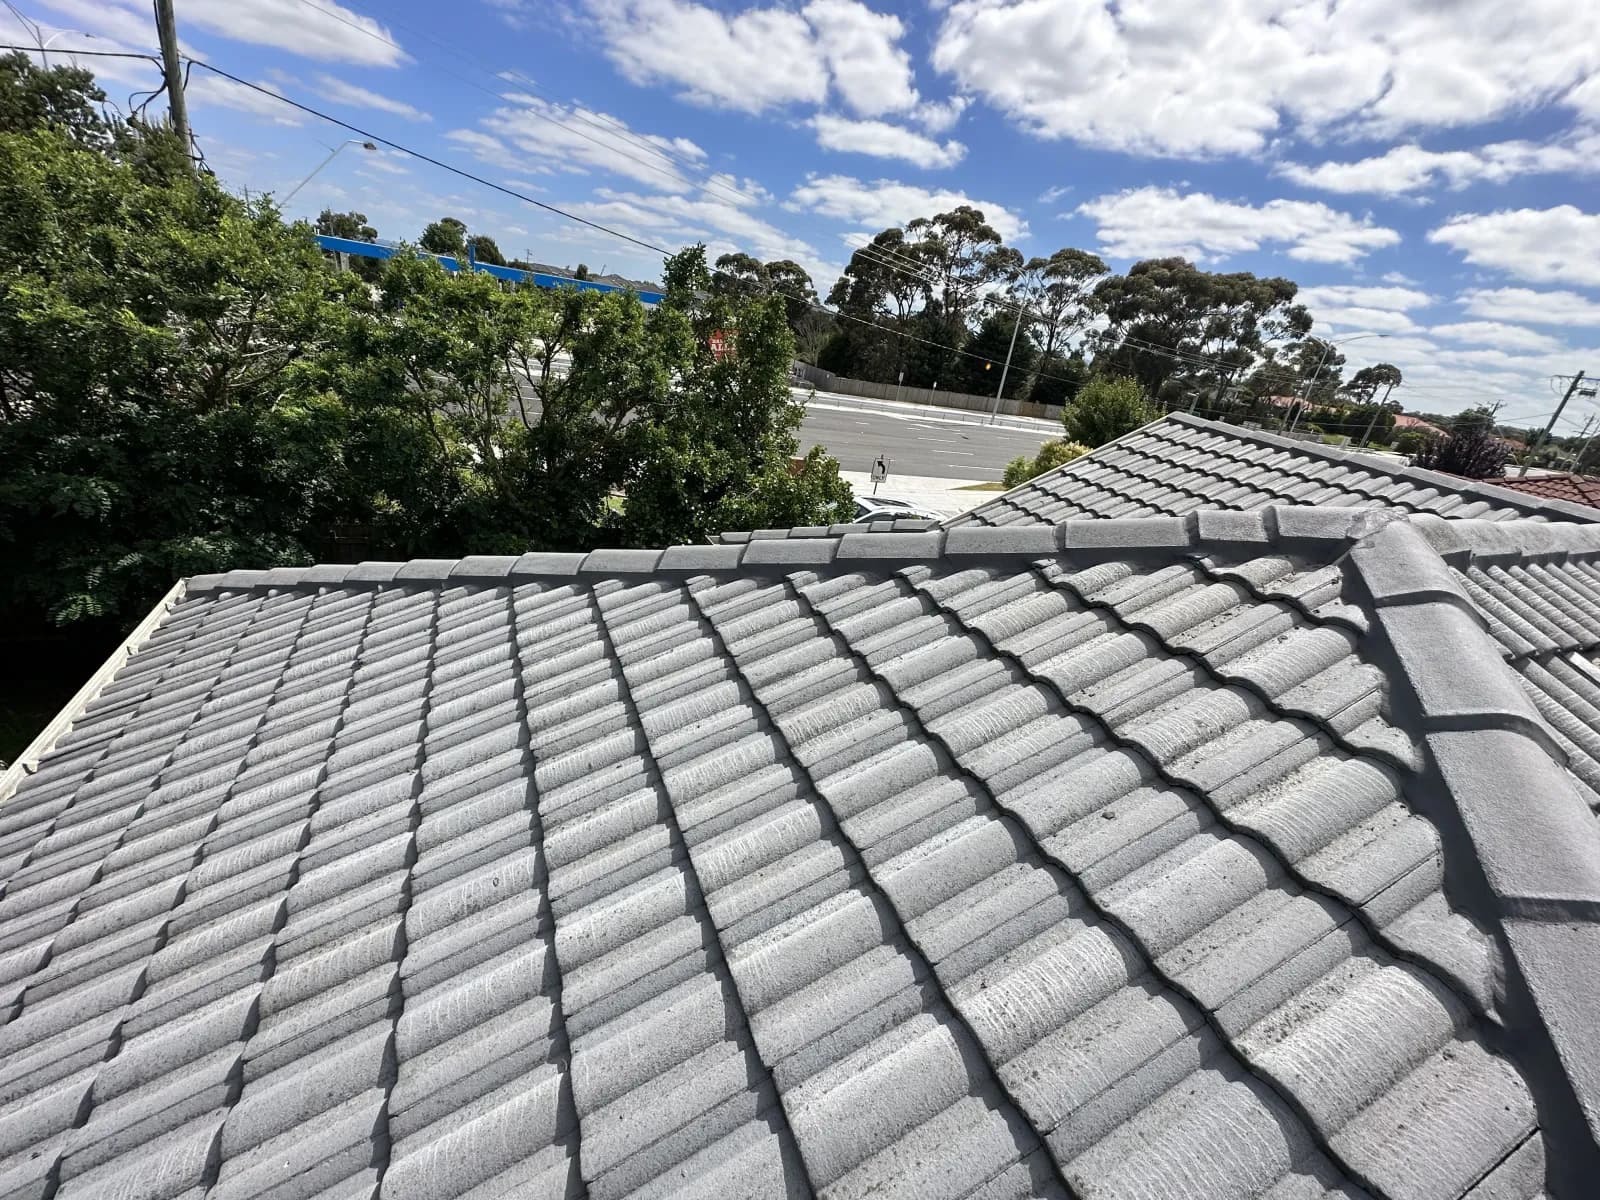
1. Broken or Displaced Tiles (Concrete & Terracotta)
This is the most common cause of leaks in suburbs like Frankston and Mount Eliza where tiled roofs dominate:
- Cracked Tiles: Tiles can crack due to storm debris (falling branches), people walking on them incorrectly, or simply age. Old terracotta tiles can become brittle and delaminate.
- Displaced Tiles: Heavy winds coming off Port Phillip Bay can lift tiles, shifting them out of their locking grooves. This leaves a gap for rain to enter.
- Blocked Water Courses: The channel on the side of each tile directs water to the next tile. If blocked with moss, lichen, or dirt, water overflows into the roof space.
2. Ridge Capping Failure
The ridge caps are the V-shaped tiles that run along the peaks and hips of your roof, held in place by bedding (cement mortar) and sealed with pointing (a flexible compound):
- Cracked Cement: In older homes (pre-1995), the pointing was rigid cement. Over time, the natural movement of the house causes this cement to crack and crumble, letting water in.
- Blocked Weep Holes: If the drainage points in the ridge are blocked, water traps behind the bedding and overflows.
- Loose Caps: If the bedding has completely failed, ridge caps can become loose. In a strong wind, they can blow off entirely — leaving the roof's peak wide open to rain.
This is a core part of our roof restoration service — we remove the old, cracked mortar and re-bed and point using flexible, polymer-based compounds that move with your home rather than cracking against it.
3. Rusted or Blocked Valleys
The valley is the metal gutter where two roof slopes meet, creating a V-shape. It handles a massive volume of water:
- Rust: Valleys are usually made of galvanised iron. Over 15-20 years, especially in salty air, they rust. Once rust eats a pinhole through the metal, you have a leak.
- Debris Blockage: Leaves and twigs accumulate in valleys. If the water flow is blocked, it backs up and flows over the lips of the valley iron and into your ceiling.
4. Flashing Failure
Flashing is the material (usually lead, aluminium, or Colorbond) used to waterproof junctions where the roof meets a wall, a chimney, a skylight, or a vent pipe:
- Lead Fatigue: Lead is soft. Over decades of expanding in summer and contracting in winter, lead flashing can crack.
- Silicone Breakdown: Many flashings rely on silicone sealants. Silicone only lasts 5-10 years before peeling away.
- Apron Flashing: Where a lower roof meets a second-storey wall, the apron flashing must be tucked under the brickwork or cladding. If it slips, water runs down the wall and into the roof.
5. Metal Roof Issues (Colorbond & Zincalume)
While metal roofs are durable, they are not immune to leaks:
- Screw Failure: The rubber washers on roofing screws degrade over time (perishing). This leaves a tiny gap around the screw hole that lets water through.
- Lap Corrosion: If water gets trapped between overlapping sheets, it causes corrosion from the inside out — invisible until it's too late.
- Box Gutters: Many modern homes in Mornington have concealed box gutters. If these block up, water has nowhere to go but inside the building.
Step 4: The Coastal Factor — Why Frankston & Peninsula Roofs Are Different
One thing that separates a local Peninsula roofer from a generic Melbourne contractor is understanding of the local environment. Roofing in Narre Warren is one thing; roofing in Seaford, Frankston, or Mount Eliza — where the bay is just down the road — is a different beast entirely.
Salt Spray and Corrosion
If you live within 5km of Port Phillip Bay, your roof is constantly subjected to salt spray:
- Galvanised Iron: Old-school galvanised valley irons and sheets rust significantly faster near the coast. We often see valleys that look fine on the surface but are rusted paper-thin underneath.
- The Solution: We use premium materials for coastal homes — Colorbond Ultra or stainless steel for critical flashings, and treat rust aggressively during restorations.
Wind Uplift
The winds coming across the bay can be ferocious:
- Sarking Damage: Wind entering the roof space can cause sarking to flap and tear, removing your secondary waterproof layer.
- Tile Displacement: Standard tile clips might not be enough. In high-wind zones, every second tile (or even every tile) may need to be mechanically fastened.
Moss and Lichen Growth
The coastal humidity promotes the growth of moss and lichen on concrete tiles:
- The Damage: These plants have roots that dig into the surface of the tile, causing pitting. They also block water channels, causing water to back up and leak into the roof space.
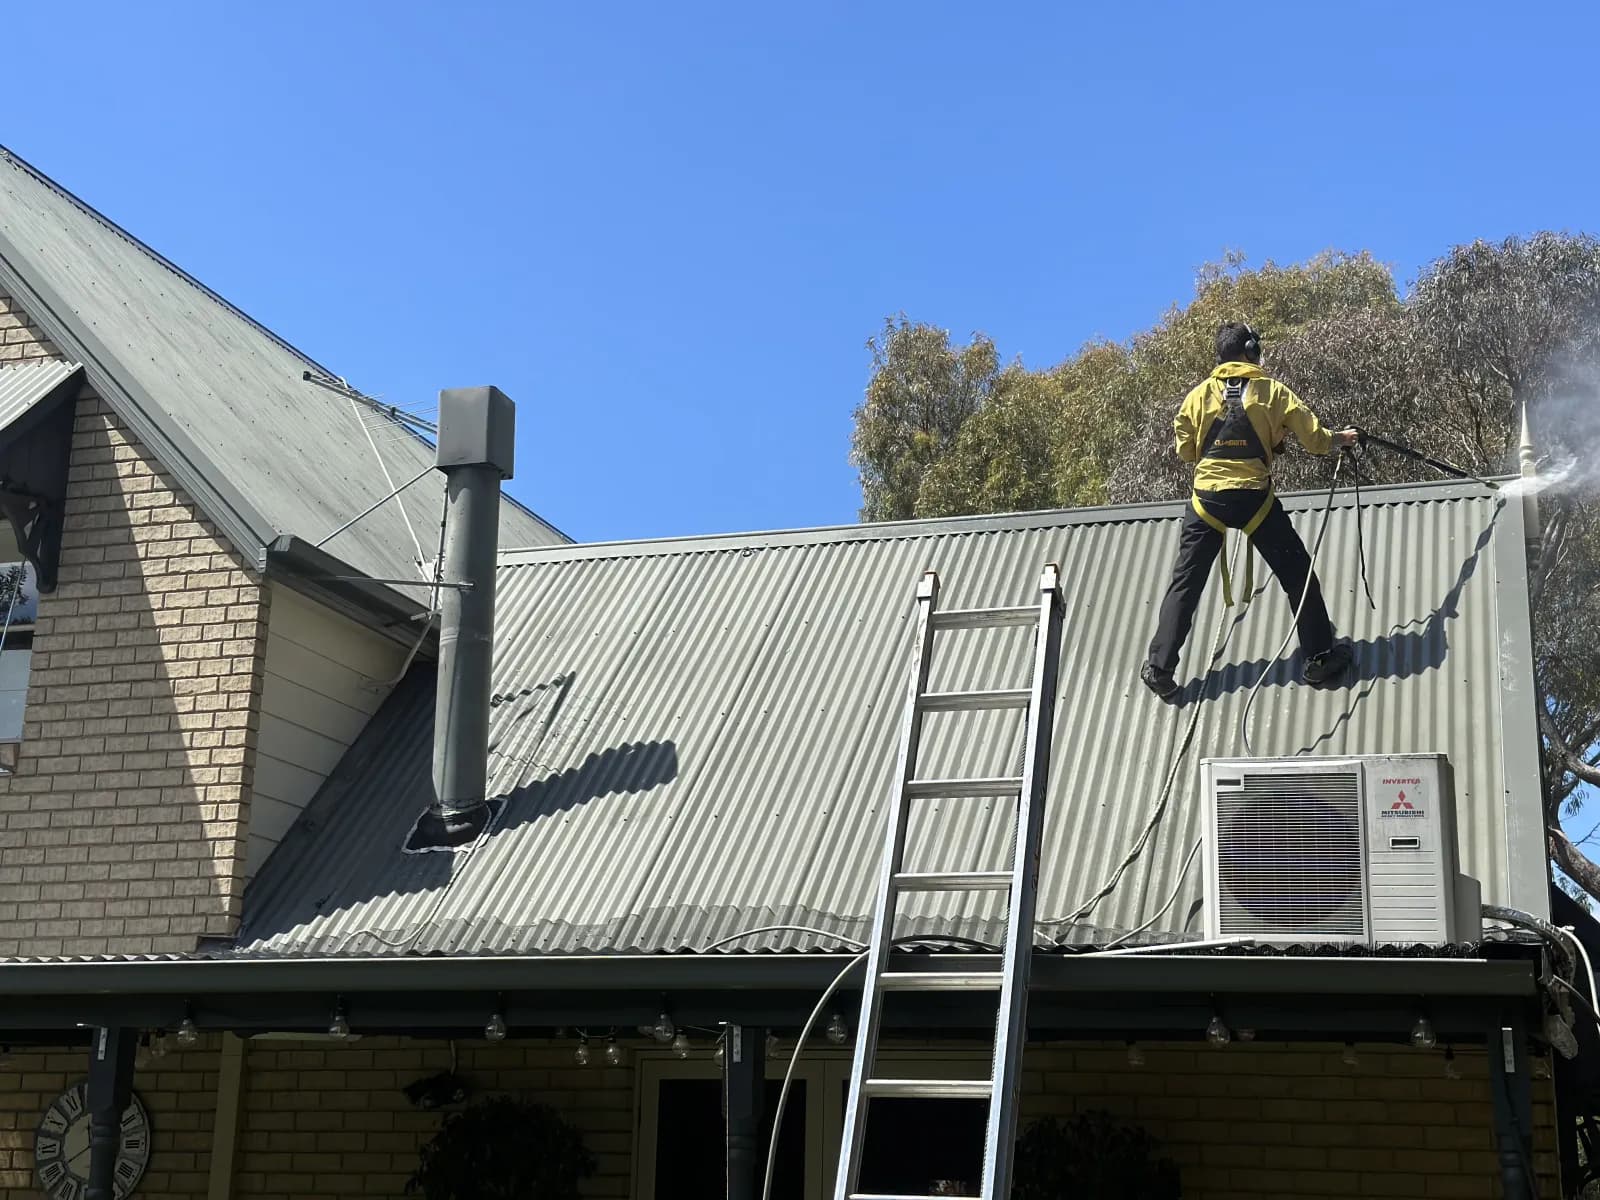
- The Fix: This is why roof painting and cleaning are about more than just looks. High-pressure cleaning removes this growth, and the sealer prevents it from returning.
Step 5: Temporary Fixes to Stop the Drip (Emergency Triage)
It is 11:00 PM on a Sunday. You have found the leak, but you can't get a professional out until the morning. You need a temporary solution to minimise damage. Remember: these are temporary measures — do not treat them as permanent repairs.
1. The Internal Tarp (Safest Option)
If you can access the roof cavity:
- Locate the entry point of the water.
- Suspend a tarp under the leak, creating a funnel shape.
- Place a large bucket underneath the tarp's lowest point.
- This keeps the water off your ceiling plaster and insulation while you wait for help.
2. The External Tarp (If Safe to Access)
If the roof is flat enough and the rain has stopped briefly:
- Buy a heavy-duty waterproof tarp.
- Place it over the damaged area (e.g., the broken tiles).
- Do not use rocks to hold it down (they can roll off and hit someone). Use sandbags or tie the tarp grommets to secure points using rope.
- Tuck the top edge of the tarp under the ridge cap or a higher row of tiles to prevent water running under the tarp.
3. Silicone/Mastic (For Small Holes in Metal Roofs)
If you have a metal roof with a small rust hole:
- Clean the area dry — silicone won't stick to wet metal.
- Apply a generous blob of roofing silicone or bituminous sealant (like "Black Jack" or "Whackerflex").
- Smooth it over to ensure a complete seal.
4. Replace a Single Tile (Slide and Swap)
If you have a spare tile in the garage (always keep spares!):
- Lift the nose of the tile above the broken one.
- Wiggle the broken tile out.
- Slide the new tile in, ensuring the locking lugs on the underside sit on the batten.
- Lower the tile above it back into place.
Step 6: DIY vs. Professional Repairs — Know the Line
We are big believers in empowering homeowners, but we also believe in honesty. There is a fine line between a DIY win and a DIY disaster.
What You Can DIY
- Cleaning Gutters: Essential maintenance. Do this twice a year — especially in autumn before the winter rains arrive.
- Swapping 1-2 Cracked Tiles: As long as they are not cemented in (like ridge tiles) and you can access them safely from a low-pitch roof.
- Trimming Branches: Keep overhanging branches at least 1.5 metres from the roof to prevent damage and debris build-up.
When You MUST Call a Professional
- Ridge Capping & Pointing: This requires mixing bedding mortar to the right consistency and applying flexible pointing. Done poorly, it looks terrible and will crack within months.
- Valley Replacement: To replace a rusted valley, you have to remove tiles, cut metal, install the iron, and re-cut tiles to fit. This is skilled trade work.
- Metal Roof Sheet Replacement: Installing metal sheets requires knowledge of correct lap direction, screw tension, and weather-proofing. Incorrect installation causes leaks and voids warranty.
- Steep Pitch or Double Storey: The risk of death or serious injury is too high for any DIY attempt. Full stop.
- Insurance Work: If you plan to claim the damage on insurance, the repair usually needs to be done by a licensed contractor to be a valid claim.
Step 7: Roof Restoration vs. Roof Repair — Making the Right Call
Customers often ask: "Mike, should I just patch it, or do I need a restoration?" Here is how to think about it:
Roof Repair
This is surgical. We come in, locate the specific leak (a broken tile, a rusted flashing), and fix that specific component. Best for newer roofs (under 15 years old) with isolated damage or storm damage.
Roof Restoration
This is holistic. A restoration resets the clock on your roof's lifespan. It is best for roofs that are 15-20+ years old and showing signs of general wear — fading, moss, crumbling mortar. Our restoration process follows 7 steps:
- Inspection: Full assessment of the roof structure to identify all issues.
- Repairs: We replace all broken tiles and rusted valley irons.
- Cleaning: High-pressure clean (4,000 PSI) to remove all moss, lichen, dirt, and oxidised paint. Crucial for adhesion.
- Re-bedding & Pointing: We remove old cement and install new bedding and flexible pointing on all ridge caps.
- Sterilisation: We apply an anti-fungal treatment to stop moss growing back.
- Priming & Sealing: A primer coat soaks into the tile to bond the paint system.
- Roof Painting: We apply two heavy coats of premium roof membrane (in your choice of colour). This waterproofs the tiles and makes them less porous — extending the roof's life by 15-20 years.
A restoration makes your home look brand new and typically costs a fraction of a full roof replacement. It's the smart choice for most ageing roofs across the Peninsula.
Step 8: Maintenance Tips to Prevent Future Leaks
Don't wait for another drip. A little maintenance goes a long way in the harsh Australian climate. Here's a seasonal checklist tailored for Mornington Peninsula homes:
Autumn (Pre-Winter Prep)
- Gutters: Clean out all leaves. If gutters are full, water will overflow into the eaves during heavy rain.
- Valleys: Ensure valleys are clear of debris — they handle the highest water volume on your roof.
- Tile Check: Scan for cracked tiles after the summer heat, which causes expansion and contraction.
Spring (Post-Winter Recovery)
- Check Pointing: Look for cracks in the ridge capping caused by winter storms and thermal expansion.
- Moss Check: Check the south side of the roof for moss build-up — it thrives in damp, shaded areas.
- Flashings: Check lead flashings for cracks that may have developed over winter.
Year-Round
- Tree Management: Keep overhanging branches at least 1.5 metres away from the roof. This stops leaves dropping into gutters and prevents branches from smashing tiles during windstorms.
- Pest Control: Listen for scratching. Possums and rats can dislodge tiles to get into the roof warmth — creating entry points for water.
Final Words from Mike
Roof leaks are stressful, expensive, and annoying. But they don't have to be a nightmare. By understanding how your roof works and keeping an eye on the usual suspects, you can catch problems before they destroy your ceiling.
Whether it is a single cracked tile in Seaford, a rusted valley in Frankston, or a full roof restoration in Narre Warren, my team is ready to help. We believe in doing the job once, doing it right, and backing it up with a warranty that actually means something. We use only premium materials like Colorbond and Dulux AcraTex because, in our local weather, cheap materials fail fast.
Don't risk your safety on a ladder. Call Frankston Peninsula Roofing today for a free roof inspection and honest advice. We'll personally come out, assess the damage, show you photos of the problem, and give you a fair, honest quote. We serve all of Frankston, Mornington Peninsula, City of Casey, and South-East Melbourne. Call Mike and the team on 0437 641 027.
Related Services
Serving Frankston, Mornington Peninsula & South-East Melbourne
We provide expert roofing services across these suburbs and surrounding areas. Click your suburb for local information and a free quote.
Frequently Asked Questions
What is the fastest way to fix a leaking roof in an emergency?
If it is raining, the safest fast fix is inside the house. Clear the area, place a bucket under the leak, and if the ceiling is bulging, make a small puncture hole with a screwdriver to release the water pressure and prevent collapse. If the weather clears, a heavy-duty tarp secured over the damaged area is the best temporary solution until a professional can attend.
How much does roof repair cost in Frankston and the Mornington Peninsula?
It depends entirely on the issue. A simple service call to replace a few broken tiles is very affordable. A valley replacement is more involved. A full restoration includes scaffolding, materials, and labour. We provide free, no-obligation assessments so you know the exact price before we start — no hidden costs, no surprises.
Why is my ceiling wet but I can't find a hole in the roof?
This is likely a flashing issue or a "tracking" leak. Water might be entering through a vent pipe or a hairline crack in the ridge mortar, running down a rafter beam, and dripping metres away from the entry point. It could also be condensation rather than a roof leak. We have the moisture meters and experience to tell the difference.
Can you perform roof repairs in the rain?
Generally, no. It is unsafe for our team (slippery tiles and metal) and sealants like silicone will not bond to wet surfaces. We can perform emergency temporary "make-safe" works if critical, but permanent repairs require dry weather for proper adhesion and safety.
My roof is 25 years old. Should I repair or replace it?
If the tiles are crumbling (fretting) to the touch or the metal is rusted through in multiple places, replacement might be more cost-effective. However, high-quality concrete tile roofs can often be brought back to life with a full roof restoration — re-bedding, pointing, and roof painting to seal the tiles, extending the life by another 10-15 years at a fraction of the replacement cost.
Need Help With Your Roof?
Get a free, no-obligation inspection and quote. We'll give you honest advice — even if that means telling you it just needs minor repairs.